English explanation for Serial Patching
|
|
|
|
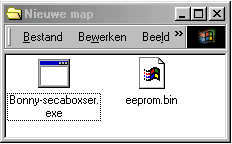
Part 1: Extraction from existing firmware Part 2: Writing new firmware to the receiver Part 3: Disclaimer, serial patching is dangerous To know what firmware version you have in your Philips receiver, the best thing to do is to secure first your original version. Than you can check it out with a textbrowser (e.g. Wordpad) We're going to explain this step by step. This part is absolutely not dangerous, you're only reading from the receiver, so no writing yet. First I would suggest that all screensavers and energysaving programs are closed. This is to prevent hanging of the system while reading/writing to the receiver. We are using a normal serial cable, the same one you use for the programmer, or for the older analogue modem. Watch out! This is not the same cable as is used for the Nokia MediaMaster or the Humax (by the way, it wouldn't even fit). Connect this cable to your comport of the PC and the serial sub-D9 connector of the Philips receiver. If you want to be completely safe, restart your computer in Dos-mode. You can do this by pressing F8 while restarting, and than choose for "Startup in only MS Dos-mode". But I had no problems doing the serial patch in a normal dos-window. For extraction of the original firmware we use the program from Bonny Gijzen, called Bonny-secaboxer. To prevent getting confused with other files, it is best you make a new map in which you put this program. Run the program (Bonnysecaboxer.exe for com 1, or Bonnysecaboxercom2.exe voor com 2) and now switch the mainpower button of the receiver on. Leave it in standby.
You will now see the screen above. To be able to communicate with your receiver you must set it to service mode.Watch out! You can't use the receiver until the service mode is switched of by the computer.
.
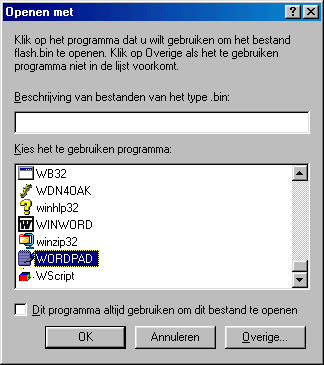
Finished! This is your basic firmware version. So this has noting to do with the type number of the receiver. It is possible you have a DSX7071 with basicversion DSX6072. That's why you always have to read out the original version first to be sure which version you have in your receiver. DST5816/13 has mostly DSX6071 basicversion. If you can't find the DSX-characters, search for DSI, than you are not so lucky! You have an older version of the DST5816 with extension /03. It is the basic DSI185 (or even DSI175) which has total different software. You can't use this version with Declink, neither can you patch this receiver with a serial cable. You have to use an Oslink for these firmware versions. It is absolutely impotant never to program the wrong software version to your receiver, because it will absolutely become a dead box! Than you can only send the box to Philips repaircenters, or search someone who has an Oslink. You can never solve this problem yourself with the serial cable, simply because you can't enter the service mode anymore. Don't start this before you extracted en secured your receiver, and found out which basicversion is used in your receiver. Again I want to remind you to close alle screensavers and enegyprograms. This is to prevent hanging of the system while reading/writing to the receiver. Also the internet connection has to be shut off, and of course close all other programs. For this step we use the program 'serial.exe'. Make a new map, and put the program into this new map, also the new firmware your want to write and the eprom file. The new firmware has to be renamed to 'flash.bin' and be sure to rename the epromfile 'eeprom.bin' (with a double e). These three files have to be in the same map, or else the program will not execute. Hook up the serial cable to the receiver, and run the program 'serial.exe'. Turn on the receiver with the mainpower button, leave it in standby.
Standard this program operates on com2! So first press 0 (zero) and enter to choose the comport (if nescassary) The program asks for the right port number, press 1 and enter. To be able to communicate with the receiver you must enter the service mode. Important! You can't use the receiver until the service mode is switched of by the computer. Be absolutely sure that the firmware is programmed without any errors before exiting the service mode, but later more on that subject.
If everuthing is o.k. you will now see the time in the display of the receiver. This gives a good feeling! If you have 'update error' in the display, you made somewhere a mistake, and it is not possible to solve this problem with your serial cable. You programmed the wrong basicversion, or there were still some verify errors (don't tell me I didn't warn you) before you exited the service mode. This problem can only be solved with a special inetrface called the Oslink. Overwriting the firmware is a dangerous process, but if you follow this manual right, you too could do it. I don't take any responsabillity for broken receivers. I can't help you repairing your receiver, because I do not have the time for it. Even if you would pay me for doing this, I don't have a registration for traders, so don't mail me for this. Build your own Oslink! You may not use other firmware in your receiver if you do this with the purpose of watching pay-tv channels without supscription. You could use other firmware version for getting more options or other languages in your menu. There are many possibillities but you can refer to the makers of this firmware/patches.
|